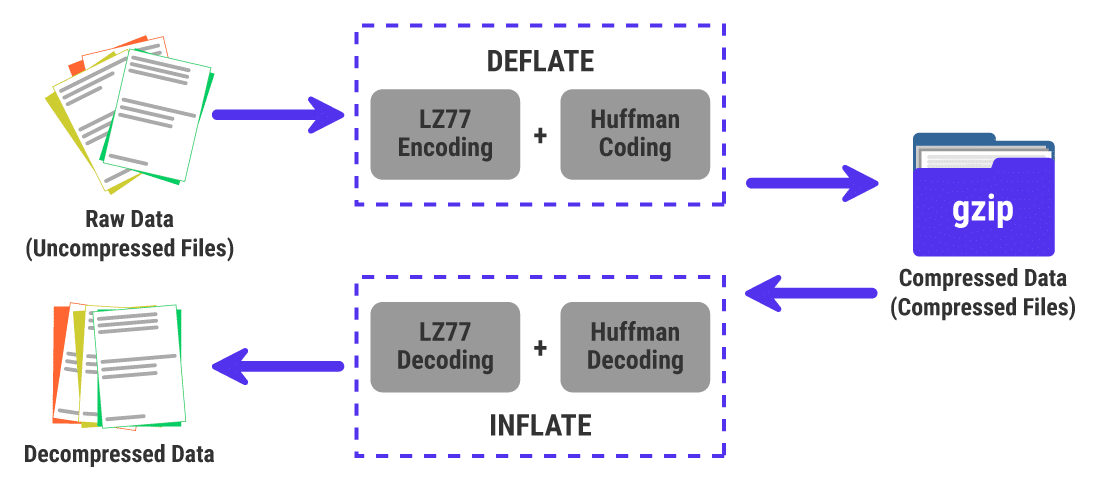
Before discussing how we can enable gzip on our server and boost our website loading speed, let’s understand how gzip compression works.
In 2024 website speed is not just a luxury; it’s a necessity. User experience, search engine rankings, and operational efficiency hinge on how swiftly your website loads.
Gzip is a file format and software application used for file compression and decompression. In the context of websites, Gzip compression significantly reduces the size of files sent from your server to the user’s browser, enhancing your site’s loading speed. This article delves into what Gzip is and guides you on enabling it for your website, a critical step in optimizing your online presence.
Let’s Formally UnderStand gZip
Gzip (GNU zip) is a compression utility designed to replace the ‘compress‘ program used in early Unix systems, offering better compression rates.
When applied to web content, it can compress web pages, stylesheets, JavaScript, and other web assets before they are sent over the network to the user. This process can reduce the transferred file size by up to 70%, making your website faster to load.
The Benefits of Gzip Compression
- Faster Page Load Times: Compressed files load faster, providing a better user experience.
- Reduced Bandwidth Usage: Smaller files mean less data transfer, which can significantly reduce hosting bandwidth costs.
- Improved SEO Ranking: Search engines favor fast-loading websites, and enabling Gzip compression can positively impact your search engine ranking.

How to Enable Gzip Compression
These days, almost all shared hosting enables this feature by default, but if you are using unmanaged VPS or a Dedicated Server, then you may follow these steps to enable gzip for your website.
1. Using .htaccess on Apache Servers
If your website is hosted on an Apache/LiteSpeed server, enabling Gzip compression can be as straightforward as adding a few lines of code to your .htaccess file:
<IfModule mod_deflate.c>
  AddOutputFilterByType DEFLATE text/plain
  AddOutputFilterByType DEFLATE text/html
  AddOutputFilterByType DEFLATE text/xml
  AddOutputFilterByType DEFLATE text/css
  AddOutputFilterByType DEFLATE application/xml
  AddOutputFilterByType DEFLATE application/xhtml+xml
  AddOutputFilterByType DEFLATE application/rss+xml
  AddOutputFilterByType DEFLATE application/javascript
  AddOutputFilterByType DEFLATE application/x-javascript
</IfModule>
2. Configuring Nginx to Use Gzip
For websites running on Nginx servers, enabling Gzip involves adding or modifying the following directives in your nginx.conf file:
gzip on;
gzip_comp_level 5;
gzip_min_length 256;
gzip_proxied any;
gzip_vary on;
gzip_types
    text/plain
    text/css
    application/json
    application/javascript
    application/xml
    text/xml
    application/xml+rss
    text/javascript;
Verify Gzip Compression
After enabling Gzip, it’s crucial to verify that it’s working correctly. Tools like Google PageSpeed Insights, GTmetrix, or WebPageTest can analyze your website and confirm whether Gzip compression is active. Additionally, you can use the command line with curl or look into the developer tools in your browser to check the headers of your site’s responses for the Content-Encoding: gzip header.