The error “ERROR TOO MANY REDIRECTS” occurs on the WordPress platform. It might look like a simple problem that has one issue, and you can solve it in a few clicks. Unfortunately, it is one problem that occurred for several reasons, and there are different solutions to get rid of it.
So let’s see how to fix the Error_Too_Many_Redirects and get rid of the error in an easy step-by-step tutorial
Solution for Error Too Many Redirects
Solution #1: Disable All Plugins
Usually, plugins are designed to get a difficult task done in a few clicks. However, WordPress users add multiple plugins on the platform, and it interferes with one and another.
Step 1: Log in to your WordPress account, and click on “Plugins > Installed Plugins.“

Step 2: Mark all plugins, and select “Deactivate” from the drop-down menu, and then click on “Apply” to finish the changes.

Make sure to clear the cache of the browser, and then test the site, if the problem persists. If the issue has not been resolved yet, then move on to the next solution.
Solution #2: Confirm Address
Those who are new to WordPress sometimes does not understand the difference between site address and WordPress address, so they end up having different URLs.

The differences can cause major issues with the page loading because the browser is expecting the site address and then it gets the WordPress address. The error “ERR_TOO_MANY_REDIRECTS” was caused due to the wrong URL.
You can check the URL by going to WordPress dashboard > Settings > General and then check Site Address & WordPress Address.
Solution #3: Delete .htaccess
The site runs on a path, and it is created by the .htaccess file and the redirection process main culprit could be the wrong configuration. In many cases, we have errors due to the wrong configuration, and you can solve them by correcting them.
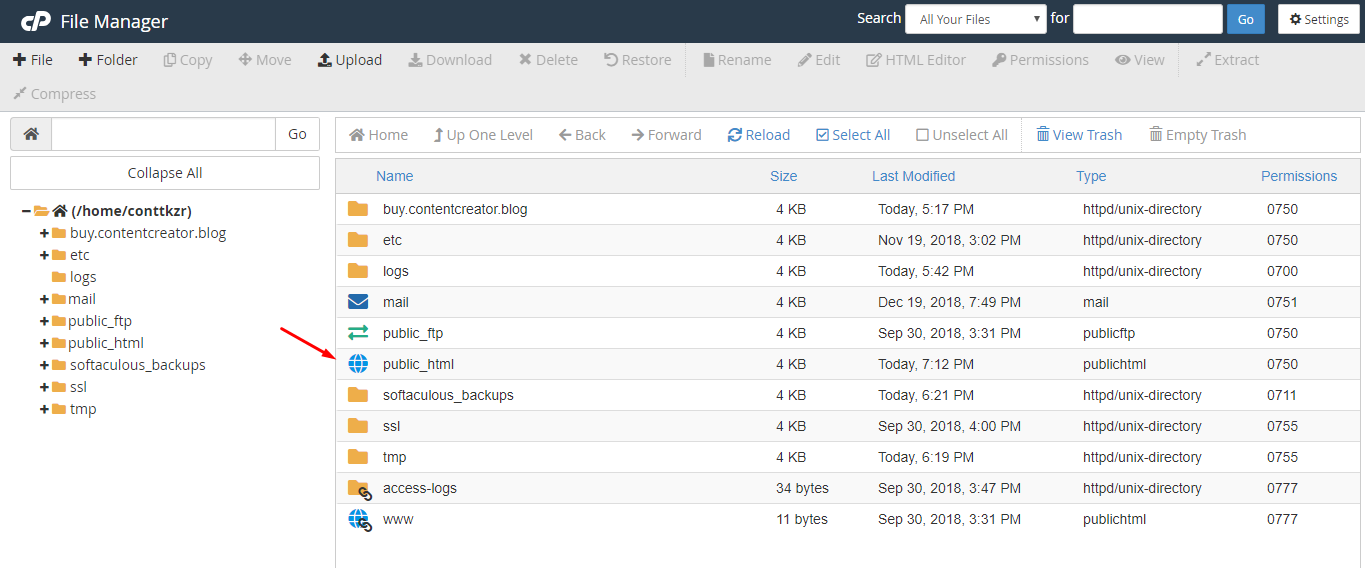
Step 1: Log in to your cPanel account and type “file manager.”

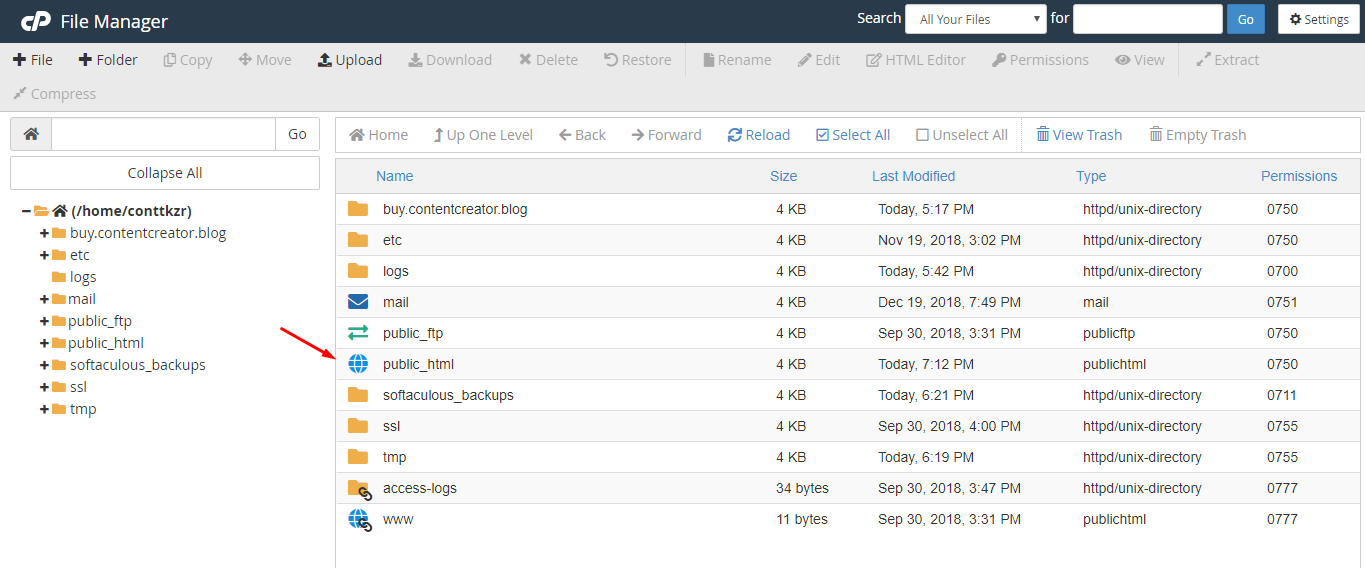
Step 2: Click on the “file manager” and click “public_html” to open it.

Step 3: If you could not find the .htaccess file, it means the file is hidden. Click on “settings” located at the top-right corner.

Step 4: A confirmation pop-up shows up, and you have to click on “show hidden files (dotfiles)” and click on save.

Step 5: Now, I can see the .htaccess file and right-mouse click to view more options, and you have to click on ”rename” to disable it. I have also pointed out that you should remember this step.

Step 6: Now, add “.old” to the file name because we will disable it, and then check if the problem resolves or not.

Step 7: In case if the solution worked out for you, go back and remove the“.old” to restore it.

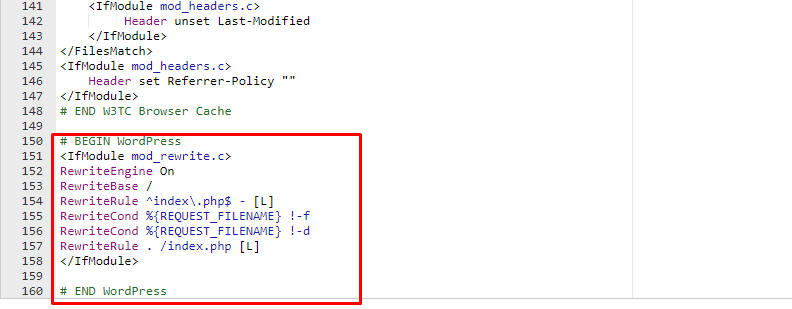
Now, add the given codes at the bottom of the .htaccess file, and you can edit it by following the step I asked you to remember earlier.
I have shared the code above, so copy and paste it to resolve the issue. In case if the problem persists, then you can contact the YouStable support team for information.
You may also like

